A delightful discovery and a bunch of radishes.

DSC_1326

Having been born and raised in Sri Lanka, a country abundant in all things green (think of lush verdant forests, tree-canopied foot paths, blue mountains, endless paddy fields… I can go on forever..) it took me a while to get used to the flat, sand-hued landscape of Dubai. I love the green stuff, so much so that when I was a kid I used to imagine myself living in a flower-bed. For someone with this kind of ‘green’ obsession, like me, a visit to the local park is always a treat, especially when there is a bonus thrown in (which you shall soon find out)!

Gallery 1

The parks in Dubai are beautiful – little emerald oases where one can escape the hustle and bustle of the city. The mercury drops towards November (it used to be as early as August – effects of global warming methinks?) and the temperatures remain a pleasant 18-23 degrees till mid-April. The moment Dubai bids goodbye to the hot desert sun, out come the BBQ grills, the beach towels, the bicycles, the picnic blankets and my most recent finding – farmers’ markets. They sprout all over the city in various places – from parks to hotel gardens to more spectacular spots like the Dubai fountains. From delicious baked goods from artisan bakers to fresh veg and fruit from local farms, these markets have something for everyone and are a foodie’s paradise.

DSC_1193

Last weekend I paid a visit to the Foodie Friday Market in Safa park (it’s hosted by Ripe, an organic food store in Dubai). The park itself is one of the most beautiful in Dubai, complete with sprawling lawns, a pine grove and even a duck pond! For those who live here, the market is near Gate No. 5 and is held every Friday from 9 in the morning till 2 in the afternoon.

DSC_1222

A mélange of delightful sights, sounds and smells welcome you as you walk towards the market…the aroma of sizzling burgers and pancakes wafts through the air making your mouth water and breezy tunes from a solo guitar dance their way into your ears while little orange, green and white flags flutter overhead.

We spent hours browsing around the stalls sampling delicious titbits – from juicy sausages and crusty bread to freshly squeezed lemonade and gooey brownies.

Picture3

Gallery 11

Gallery 12

Gallery 9
I also bought this beautiful bunch of organic and locally grown radishes from the Ripe stall (they were so gorgeous that I wrote them a little poem). For lunch that day I made a simple radish salad which tasted amazing and oh-so-fresh! They say food tastes better when you know where it came from and who grew it, well I couldn’t agree more.

Gallery 8
DSC_1449

DSC_1404

Arugula & Radish Salad with Lemon and Parmesan
adapted from Lemon Tart Recipes by Tami Moritz
Serves 4

8-10 radishes, sliced
1 green apple, cut into matchsticks
Arugula, washed, spun and dried (I couldn’t find arugula so used baby lettuce instead )
Zest and juice of half a lemon
1 tbsp + 2 tsp olive oil
Freshly ground pepper
4 pinches coarse salt
Parmesan cheese (Parmigiano-Reggiano)
Crispy fried shallots

Add the lemon zest into a large bowl. Pour olive oil over the top. Leave to sit about 15 minutes or up to 2 hours for the lemon zest to infuse the oil.

Just before serving toss arugula into the oil and zest mixture and toss gently with your hands. Allow each leaf to become coated with the oil. Add more oil if necessary, do not overdress. A coating is all that’s needed. Sprinkle on the lemon juice, gently tossing. Season with salt and pepper. Give another toss and then pick up a leaf and taste. Add more lemon juice if required.

Scatter over the radishes and apple. Using a vegetable peeler shave off curls of Parmesan and scatter liberally over the top of the salad and sprinkle over the crispy fried shallots. Serve at once.

Poem

‘Tis the season to be jolly – and make something Christmassy!

Featured image

I love Christmas. I love everything about Christmas – the colours, the smells, the excitement, the presents, good old Mr. Clause and the radio blaring out cheerful holiday tunes… ‘It’s the most wonderful time of the year..’! I’m Buddhist and Christmas is not celebrated as much over here (you won’t find neon reindeer prancing around people’s front porches!) but you cannot escape that festive feeling in the air, come December.

Gallery 1
To bring in some Christmas cheer and fill the house with the delicious smells of baking I decided to roll up my sleeves and attempt at making (trumpet call and drum-roll) the King of patisserie Eric Lanlard’s raspberry and chocolate tart. A very ambitious dessert for someone who’s made a tart only once in her life (pastry crumbled and the savoury filling was heavy) but who cares, it’s Christmas! Besides I’m not very fond of heady fruity puds and cakes which are traditional Christmas fare. Everyone loves chocolate and the raspberries add that perfect touch of Christmas red.

I also made an Asian inspired (Sri Lankan to be precise) starter – fish cutlets. Not the fanciest of starters to serve at a festive dinner party but they are delicious, and I gave these plain Janes an elegant makeover by making a little tower out of them, like a mini croquembouche  –  you see, it’s all in the presentation!

Gallery 4
I spent an entire morning (during my weekend of course) shopping for the ingredients. Then I locked myself in the kitchen and did not emerge till Sunday morning when I went for work (in the Middle East the weekend falls on Friday and Saturday). I swore to myself I will not set foot in the kitchen for a long time to come. It was exhausting work and there was a lot of nail biting, hair pulling and stamping as well as moments of sheer elation. Oh the pains and joys of cooking!

First things first – the starter.

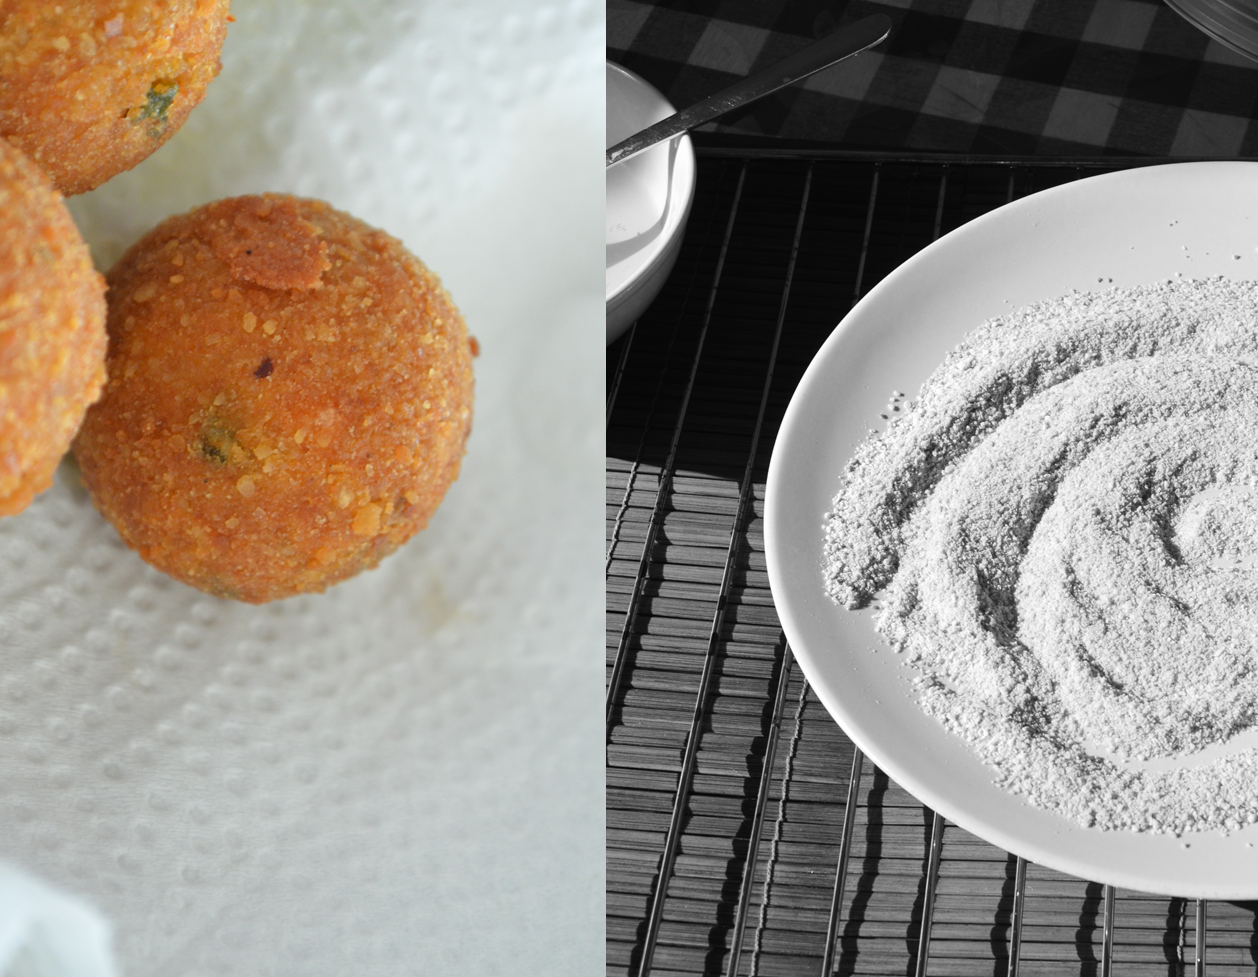
Fish cutlets are pretty simple to make and do not require fancy ingredients – tinned tuna, potato, some red onion and green chillies and a few pinches of spices. They are shaped like little spheres, you can shape them any way you want but the original Sri Lankan cutlet is shaped into a perfect little ball. These are then crumbed and deep fried till golden. Soft and moist on the inside and golden and crunchy on the outside, these cutlets are delicious served straight out of the frying pan.

Gallery 7

Gallery 9
And here’s my little tower of fish cutlets served on a very special plate. This is a replica of the china used for private dining services in the first-class suites of the RMS Titanic which I bought from a Titanic artefact exhibition in Calgary. The matching tea cup below is one of the artefacts from the shipwreck.

DSC_0993
Gallery 11

Moving on to the tart…

Making a tart is laborious work, especially when it’s Eric Lanlard’s tart! But I was up early morning ready to tackle the dreaded shortcrust pastry. A buttery and chocolaty aroma wafted from the pastry dough and just as I had anticipated the baking tart shell filled the house with delicious smells.

I took pictures of these gorgeous raspberries while the pastry case cooled down.

DSC_0792

Gallery 17

While rolling out the pastry I knew something wasn’t right. It started crumbling and sticking on to the rolling pin, but I was too impatient to get it in the oven, especially when I have been dreaming big beautiful tart dreams the night before. There are some things you just cannot rush…I realised this (maybe a little too late) when I plopped the tart crust out of the baking tin on to a plate and it broke into smithereens! My heart sank right to the bottom of my stomach. My tart dreams were shattered.

I was tempted to start all over but instead I crumbled the shards and mixed it with butter and made a sort of crumble which I used to line the bottom of the tart tin. Then I filled it with raspberries and poured the chocolate ganache over the top. Instead of being cosily enveloped in a flaky chocolaty tart case the silky ganache had to lie uncomfortably on  a gravelly mixture of burnt crumbs!

Gallery 15

I spent the next half hour looking for some guinea pigs to try my tart. My berry-hating son ran away in horror when he saw the raspberries hidden beneath the chocolate but my husband was not so lucky. He pronounced it ‘you-get-used-to-the-taste-after-a-few-forkfuls’. It did not taste too bad. The ganache is decadently rich and smooth and if you can get the pastry right this one’s a keeper. I have given the recipe below for all those baking goddesses who can turn out picture perfect tarts with two flicks of their magical rolling pins.

As for me, well, I think I’ll stick to cupcakes for a while.  Happy holidays! xx


Fish Cutlets

SL Flag


2 tins of good quality tuna in oil
2 medium sized potatoes, peeled
1 medium red onion, finely chopped
2-3 fresh green chillies, finely chopped
2-3 curry leaves, finely shredded
1-2 tsp chilli powder
1 tsp turmeric
1 tbsp oil and extra for deep frying
1 egg, beaten
Breadcrumbs
Salt to taste

Boil the potatoes in salted water till soft and well cooked. Roughly dice the boiled potato and put in a large bowl. Add the spices and salt to the potato and gently mash together to incorporate the spices and keep aside. Drain most of the oil from the tuna (keep about a tablespoon, this will make the mixture moist) and empty into another bowl. Add the chopped green chillies to the tuna.

Heat the oil in a large frying pan. Once the oil is hot add the onion. When the onion turns soft and slightly brown add the  shredded curry leaf. Sauté for a minute or so. Add the tuna and green chillies and fry for a further minute. Finally add the spiced potato and give it a good mix. Add more salt if required. Fry the mixture for 2-3 minutes and turn off the heat.

Once the mixture has cooled down, shape into bite sized balls using your palms. Cool the shaped balls for a while in the fridge before frying (they’ll keep their shape better). Dip each ball in beaten egg and roll in the breadcrumbs till well coated.

Heat the oil in a deep frying pan and once it is nice and hot drop in 2-3 cutlets at a time and fry till golden brown. Drain on kitchen paper and serve immediately with some chilli sauce for dipping.

DSC_0936

Eric Lanlard’s Raspberry & Chocolate Tart
😐 = my rating for the tart

50g (2oz) cocoa powder
50g (2oz) golden icing sugar
150g (5oz) unsalted butter, cubed, plus extra for greasing
3 egg yolks
1 tsp vanilla extract
500g (1lb) raspberries

For the ganache
200g (7oz) dark chocolate, roughly chopped
200ml (7fl oz) single cream
2 tsp vanilla extract
75g (3oz) unsalted butter

Sift the flour, cocoa powder and icing sugar together into a large bowl. Add the butter and rub in using your fingertips until the mixture resembles fine breadcrumbs. Add the egg yolks and gently mix together, then add the vanilla and combine to form a smooth dough. Cover with clingfilm and leave to rest in the refrigerator for at least 30 minutes.

Preheat the oven to 190°C (fan 170°C)/375°F/gas mark 5.

Lightly grease a 24 cm (9½in) diameter tart tin. Roll out the pastry on a lightly floured surface and carefully use to line the tin. Cover with ovenproof clingfilm and prick a few holes to avoid pockets of air while it bakes. Fill the pastry case with baking beans and bake in the oven for 15 minutes. Remove the clingfilm and beans and return to the oven for a further 5 minutes. Leave to cool.

To make the ganache, melt the chocolate in a heatproof bowl set over a saucepan of barely simmering water, making sure the surface of the water does not touch the bowl. Meanwhile, put the cream into a saucepan and heat until steaming hot, but do not let it boil.

Remove the melted chocolate from the heat and slowly pour in the cream, gently stirring the mixture. Add the vanilla, then the butter and stir together.

Pack the cooled pastry case with raspberries, saving a few for decoration. Pour the hot chocolate ganache over the raspberries to fill to the top of the pastry.

Leave to set in the refrigerator for at least 30 minutes.

Serve decorated with the reserved raspberries dusted with a little icing sugar.

DSC_0851
Fa la la la laaaa la la la laaaaa!


The perfect pol sambol

SL Flag

Whenever I think of Sri Lankan food the first thing that comes to my mind is pol sambol –  a coconut relish made with freshly grated coconut, dried red chillies, red onions, salt, lime juice and umbalakada (also known as Maldive fish) which is cured fish traditionally produced in the Maldives and commonly used in Sri Lankan dishes. Pol sambol is served as an accompaniment to rice, iddi appa – string hoppers (stringy rice pancakes), appa – hoppers (a sort of rice flour pancake) roti and even plain bread and butter (look out for a post on Sri Lankan food later). It goes well with everything but I prefer to eat it with steaming hot rice.

This dish reminds me of picnics we used to have in a place called Riverston in Sri Lanka. It’s an isolated little mountain range where you find grass growing in the middle of the road and tall fragrant pine trees growing thick on either side. Our picnic spot used to be next to a beautiful little stream. We would take a dip in the icy cold water before tucking into little parcels of rice, pol sambol and other gorgeous curries all wrapped in banana leaves. The aroma of the banana leaf and the rich curries combined with the fresh mountain air and the tinkle of the stream was just divine…

????????????????????????????????????
Harsha Matarage

Back to pol sambol.

Sri Lankan cuisine is a lot similar to South Indian food, especially that of Kerala (I have had the wonderful opportunity to experience authentic Keralite dishes as my husband is from Kerala and his mom and sisters are brilliant cooks). Our iddi appa is known to them as iddi appam, appa is appam, and pittu (a breakfast dish made out of rice flour and coconut) – puttu. We often argue over the origins of these dishes but the differences between the two cuisines are so fine that it is difficult to say who invented what. Fortunately no claims have yet been made on our humble pol sambol.

The authentic way of preparing a pol sambol is by grinding it on a rectangular block of granite with a granite rolling-pin of sorts which is known as a miris-gala in Sinhalese (literally translated to chilli-stone). These grinding stones are used for grinding all sorts of pastes used in Sri Lankan curries. Not everyone living outside Sri Lanka owns a miris-gala and the one I have is a spare from my sister-in-law. A good old stone mortar and pestle works just fine.

DSC_0379

Pol sambol is best prepared with fresh ingredients but I have given substitutes in the recipe as some of the ingredients can be difficult to get hold of.

Ingredients 2 - Copy

First, throw in the dried red chillies and salt on to the grinding-stone (or into the mortar and pestle) and grind into a fine paste – this requires a lot of elbow grease but don’t be disheartened because the paste is the backbone of the entire dish, you need to get it right. If the mixture gets too dry and difficult to grind add a teaspoon of water (no more than a teaspoon otherwise it will be too wet). You know it’s ready when there are no chilli seeds visible in the paste. Add the Maldive fish flakes (if using) and give it a little grind – don’t overdo it, you want to have little flecks of fish in the sambol to give it texture.

Grinding

Next, add the coconut and combine with the paste. Use the pestle to push the paste into the coconut so it absorbs the flavour and colour of the chilli paste. Throw in the red onions. Give these little rubies a good bash with the pestle and mix it with the coconut. Do not grind the onion too finely; we are looking for little chunks, not a slimy mush.

Grinding 2

That’s your basic pol sambol, done. You can make a variation of this by sautéing the pol sambol in mustard seeds, curry leaves and sliced onion (it’s called badapu (sautéed) pol sambol and I absolutely love it!). If you are tempted to try both, divide the coconut mixture into two parts.

To finish off the basic version, add a generous squeeze of lime juice and give it a good mix (best done using your bare hands. It may seem a bit repulsive but somehow the flavour intensifies when mixed with your fingers).

Lime juice

Now for the tempered version. Get a nice frying pan (the one I have used is another typical South Asian cooking utensil used for making hoppers and doubles as a frying pan).

DSC_0585

Heat some oil on high heat. When the oil is nice and hot throw in the mustard seeds and when they start to splutter add the curry leaves and sliced onions. Sauté well till the onion turns brown and add the pol sambol (the one without the lime juice). Give it a good mix and let the mixture dry out a bit before taking it off the fire.

DSC_0583

Gallery - steps

The perfect Sri Lankan pol sambol – two ways!

DSC_0634

DSC_0652

Spoon


Pol Sambol

1 freshly grated coconut
(substitute – desiccated coconut. Before using, sprinkle some water over the coconut and microwave for a minute to moisten the coconut).
5 whole dried red chillies
(substitute – 1/2 tsp of red chilli flakes and 1 tsp of red chilli powder, adjust depending on the amount of heat you can handle!)
6 red button onions / small pink shallots
(substitute – 2 tbsp roughly chopped red onion)
1 tbsp Maldive fish
(optional, unfortunately there’s no substitute for this)
1 tsp salt
Juice of one lime

Throw in the whole chillies (or chilli flakes and chili powder) and salt into a mortar and pestle and grind till it turns into a fine paste (there should be no visible chilli seeds). Next, add the Maldive fish and mix in with the paste. Add the onions. Using the pestle crush the onions and combine with the chilli paste. Finally add the grated coconut and give it a good mix with the pestle till the paste is completely mixed in with the coconut.

For the basic pol sambol, add a generous squeeze of lime and mix well, ideally using your hands – yes! Using a squeaky clean hand, mix the sambol using gentle pressure for about 15 seconds, this intensifies the flavour of the sambol. Serve immediately with rice, string hoppers, hoppers, roti, bread and butter or just about anything you fancy.

Sautéed pol sambol
Do not add lime juice to the final coconut mixture. Heat around 1 tbsp of oil in a frying pan until very hot. Throw in 1 tsp of mustard seeds. When they start to pop and splutter, add around 2 tbsp of finely sliced red onion and 5-6 curry leaves. Sauté until onions turn golden brown. Add the coconut mixture and give it a good mix. Sauté the sambol until the coconut turns slightly dry (around 2-3 minutes).  Serve immediately or let it cool down completely and store in an airtight container in the refrigerator (keeps well for 2-3 weeks).

DSC_0682

Let’s make DOUGHNUTS!

My son Aarav has been saying this over and over and over again for the past three weeks. He loves doughnuts, the big greasy sugared blobs sold in the famous doughnut chains. For him, it’s a rare indulgence as I have limited this artery clogging treat to just one or two a month (unless my husband decides to break the rules – which he does once in a while).

This weekend I decided to take ‘Make doughnuts with mummy’ off Aarav’s wish list. It was a cold rainy day – a rare occurrence in this part of the world – and piping hot doughnuts with a steaming cup of coffee seemed just the right thing to complement the weather. Armed with Jamie Oliver’s Cook with Jamie and a mountain of cooking utensils (I am a one-bowl-dish kind of gal) I braved the kitchen with my five year old in tow to make Doughnuts with Old English spiced sugar.

Pic 1

The recipe called for simple ingredients – flour, yeast, butter, orange and lemon zest and warm milk, store-cupboard staples so to speak but the process itself seemed time consuming as the dough needs to be left to rise an hour plus 45 minutes. I thought it would be worth going the extra mile as the book describes these as ‘crisp, bun-like and delicious!’

Ingredients for spiced doughnuts

Picture3

It was smooth sailing from start to finish. The recipe had easy to follow steps and Aarav helped me with all the stirring, kneading and rolling. He got quite impatient each time we had to take a break – 15 minutes for the yeast to work through and 1 hour for the dough to rise… (you can use this time to prepare the spiced sugar).

Picture2

DSC_0153

DSC_0155

DSC_0171

After much mixing, waiting, kneading, rolling and poking little holes in the doughnuts with a chopstick (a brilliant idea – I love Jamie’s no-nonsense approach to food – avoid if you want fried doughnut holes) it was time to fry these babies. They came out of the frying pan golden and puffy ready to be rolled in the Old English spiced sugar. You need to do this while they are still piping hot. Et voilà!


DSC_0176

What sets these apart from the ordinary doughnut is the lemon and orange zest you add to the dough which gives it a sophisticated zing and the spiced sugar with subtle hints of vanilla, cinnamon and nutmeg. However I found these a bit bland. I believe it is because there is no salt added to the dough (even the butter is unsalted). If I were to make these again I would add half a teaspoon of salt or replace the unsalted butter with salted.

Did Aarav like these? Sadly, no. I guess they were too sophisticated for his baby taste buds.

Note: I rate all the recipes I try by drawing smileys on them, so whenever I feel like cooking something I know which ones to pick.

My recipe rating system
🙂 🙂 = Great! Will make often   🙂 = Good, worth making again   😐 = Confused   😦 = Bin it!

So what did Jamie Oliver’s spiced doughnuts get?

Maybe, maybe not..

Below is the recipe which I have altered slightly by adding half a teaspoon of salt. Do let me know if they turn out yum! xx

Doughnuts with Old English Spiced Sugar
from Cook with Jamie
(makes about 25)

1 x 7g sachet dried yeast
70g/2½oz caster sugar
500g/1lb 2oz plain flour
315ml/11fl oz whole milk, warmed until tepid
zest of 2 lemons
zest of 1 orange
80g/2¾oz unsalted butter, softened and cubed
1 litre/1¾ pints vegetable oil
½ tsp salt (not in the original recipe)

for the flavoured sugar
100g/3½oz caster sugar
1tsp ground cinnamon
½ tsp freshly grated nutmeg
½ tsp ground allspice
zest of 1 lemon
zest of 1 orange
1 vanilla pod, scored lengthways and seeds removed

Put the yeast in a bowl with a tablespoon of the caster sugar and a tablespoon of the flour and mix in the warm milk. Put in a warm place for about 15 minutes until the mixture becomes frothy.

Next, put the rest of the sugar and flour, lemon/orange zest, salt and butter in a bowl. Add the yeast mixture and use a spoon to start bringing it all together, then use your hands to mix it into a ball. If it’s too sticky add a bit more flour. Knead the dough for 5 minutes until it’s smooth and silky, then put in a bowl, cover with a clean damp cloth and leave to rise for about an hour or until doubled in size. Meanwhile make your flavoured sugar by mixing the sugar, spices, zest and vanilla seeds together in a bowl or smashing them up in a Flavour Shaker. Put aside for later.

When the dough has doubled in size, knock it back (you punch out some of the air so it can rise again later – this way your doughnuts will be light and fluffy). On a floured surface roll the dough out until it’s an even 1cm/½ inch thickness. Using a little cutter or a small glass (approx.5cm/2 inches in diameter) cut out about 25 circles and place them on a greased baking tray to rise again (make sure there is sufficient gap between each one to allow them to spread). Cover with the damp cloth and allow to rise for 45 minutes.

When the blobs of dough have doubled in size again, use a chopstick to make a little hole in the centre of each doughnut. Now they are ready to be fried. Carefully heat the vegetable oil in a large deep frying pan (test the temperature by putting a small piece of dough into the oil – if it sizzles and turns golden brown after one minute the oil is at the right temperature). Fry the doughnuts in batches. After about 2 minutes, when they are golden brown carefully lift them out with a slotted spoon and place them on some kitchen paper to drain. While your doughnuts are still piping hot, sprinkle over the flavoured sugar.

Lovely eaten warm and eat them all in one go because they don’t keep very long.